
Hello, my name is Jordan Monson and I am the acting lighting director here at Willow Creek Community Church.
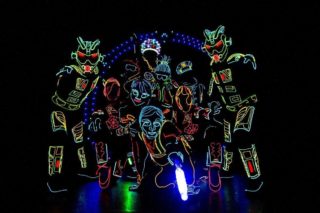
I have also worked and toured with the company iLuminate in some capacity for the last seven years. For those who don’t know what iLuminate is, they are a dance company who perform in light up LED and EL wire costumes for full Broadway style shows.
They are currently touring their show Artist of Light, and have been on America’s Got Talent, several off Broadway theaters in New York City, and worked with artists Chris Brown, Christina Aguilera, The Black Eyed Peas, and David Guetta.
All that to say, I have a bit of experience with unconventional lighting, and using this relatively low cost medium to make stage designs, costumes, and Art.
The Physical Stuff:
Let’s start by talking about the hardware, what it is, what do I need, and how does the physical hardware work together?
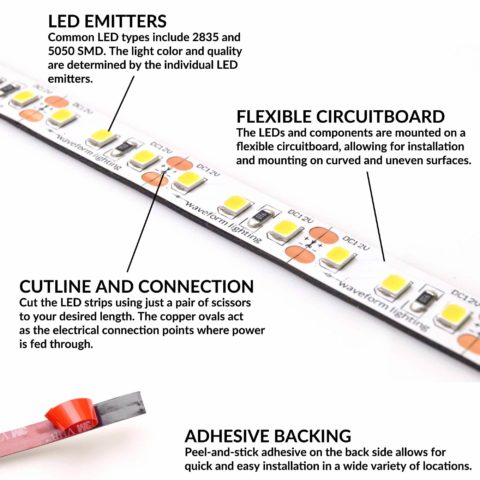
First what are we talking about when we say led tape.
LED tape is a flexible circuit board, normally with an adhesive backing, that Light Emitting Diodes are attached to, at set intervals.
Analog LED Tape
Analog LED tape is the simplest version of LED.
They are normally 12v, and powered from a dmx driver/decoder.
The dmx driver/decoder takes dmx signal and gives you between 1 and 4 channels of LED control. in a pinch you can just give the strip 12 volts of power, and it will turn on at full brightness.
When using Analog LED tape you control the whole length of the strip at the same time, there is no control over individual sections.
Types of Analog LED tape include single colors, like white, red, or purple, as well as RGB (red; green; blue) and RGBW (red; green; blue; white) color mixing LED tape.
Where is Analog LED Tape Best Used?
Analog LED tape is great for when you have a lot of distance to cover and don’t need individual pixel control, or if you don’t want to mess with a media server, because you can run it right from your console.
It works great for side illuminating scenery, long color changeable set elements, and can make decent foot lights.
As a note for foot lights make sure you purchase the correct color temperature white LEDs with a 90+CRI.
Analog LED DMX Driver/Decoder:
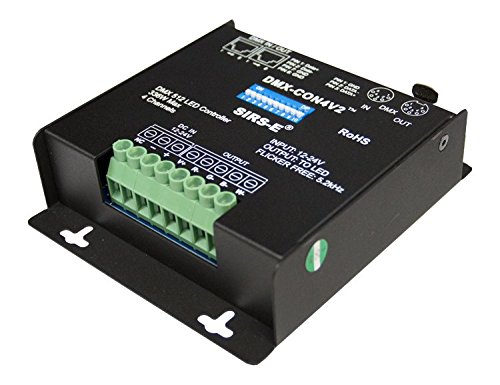
Analog LED drivers come in a lot of shapes and sizes. Different drivers include, 3 channel RGB with options ranging from $20-$400 that can include multiple RGB outputs and refresh rates.
So what do you actually need?
Well, that depends on what you are trying to do.
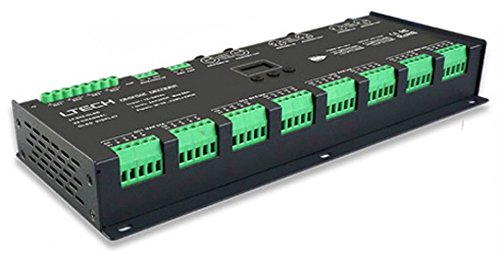
If you can centrally locate your drivers and run multiple outputs of LED from the same location then there can be a pretty big cost savings by using drivers with multiple outputs.
Note, some of the lower cost drivers will cause some flicker to be seen in cameras. To resolve this you will need a high speed LED driver like the ones made by Sirs-e.
Once you have decided upon the right driver you will also need a power supply to provide power to the LEDs. You will need to do a bit of math here based on the length and density of LEDs you plan on controlling with each driver. To find the correct amperage power supply, you need your strip length and the number of LEDs per meter. Then multiply the strip length by the number of LEDs per meter. Then multiply your answer by each LEDs current draw. (See data sheet)
Example: 1 (meter) x 60 (LEDs per meter) x 20 mA (current draw) = 1,200 mA. Once you have that, divide it by 1000 to determine your amperage. Example: 1,200 mA / 1,000 = 1.2 amps. So for 5 meters of led tape (standard reel) with 60 LEDs per meter, you will need a 6 amp power supply.
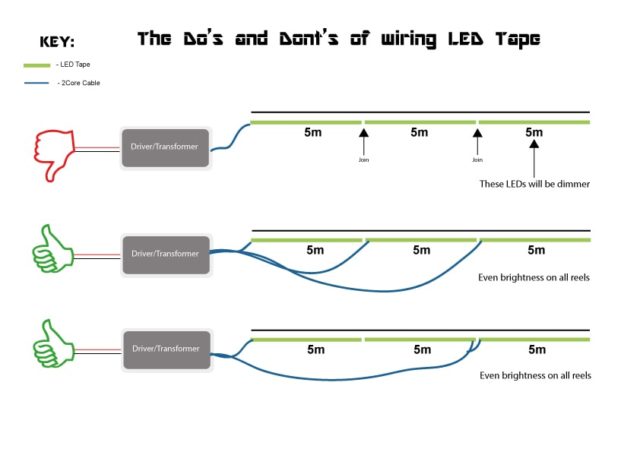
You will also need to keep the length of your LED tape short enough to not get brownouts (voltage drops along the tape) or you may need to inject power along the strip somewhere by running additional wires from the driver and soldering them periodically to the LED tape.
Digital LED Tape
Digital LED tape is becoming a lot more popular lately because of its design flexibility. Not only can you control an entire section, but you can control it all the way down to the individual pixel level.
With this flexibility comes a lot more complexity. We are not just talking about 3 dmx channels per LED section, but 3 dmx channels per pixel. Meaning you could be using a whole dmx universe or more for a section of LEDs. I am often running 100+ universes worth of LEDs in my system here at Willow.
Chip Types
When we talk about digital led we also need to talk chip types. And by that I mean the actual micro controller driving the LEDs on the LED tape itself. There are 4 major chip types used in LED tape, and each has its pros and cons.
WS2811/WS2812/WS2812b/NeoPixel – 3 wire interface; power, data, and ground. Very timing specific so it is hard for a threaded device like a raspberry pi to control. It has a relatively slow refresh rate of around 400hz but is normally one of the cheapest options.
WS2801 – 4 wire interface; power, data, clock, and ground. Normally more expensive, but tends to handle interference a little better. Because of the dedicated clock line, threaded controllers work well. It can run on what is basically a SPI bus and can be easily controlled from a lot of different micro controllers.
APA102/DotStar – 4 wire interface; (similar to the WS2801) power, data, clock, ground. Uses a newer chip type than the previous two, and is normally between them both in price. It has an easy interface for the driver to work with extremely fast data (up to 32mhz) and refresh rates (around 19khz ). It is great for longer sections of LEDs, and large grids on a single driver channel.
APA104 – 3 wire interface; power, data, ground. Newer slightly improved version of the WS2812b.
There are actually a few others as well but for the most part these are the ones you will normally run into. They are each controlled a little differently so you need to make sure your LED driver supports the chip type you are getting.
Form Factors
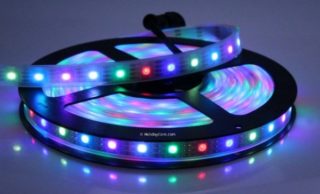
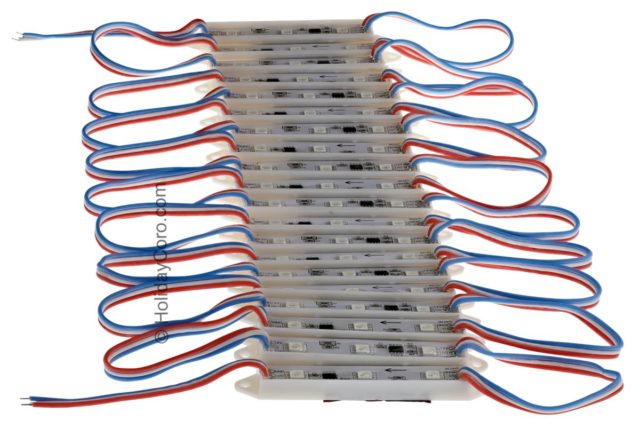
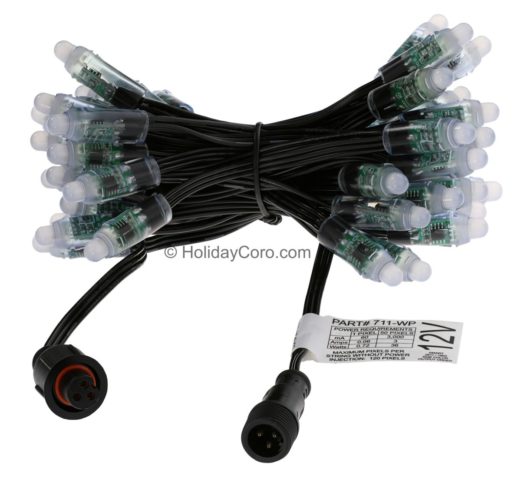
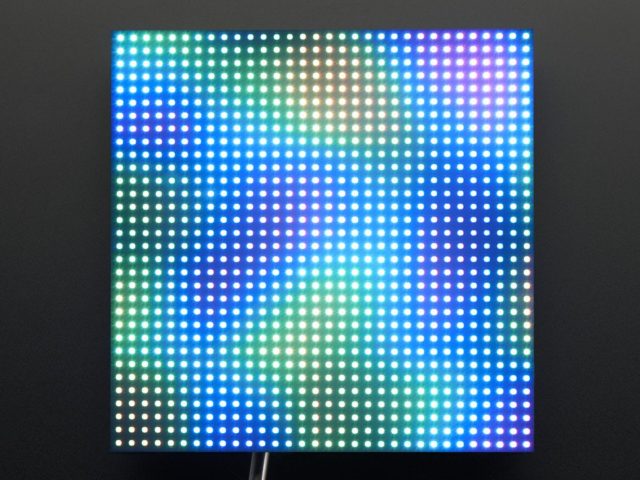
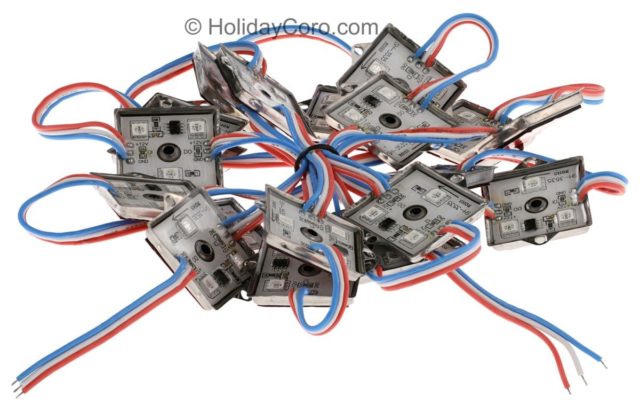
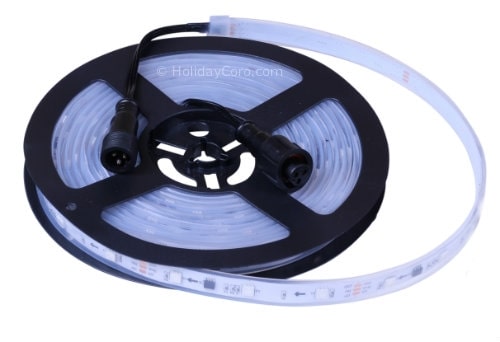
There are many different forms of digital LED products, some that are more typical tape style, some that are single pixels/nodes/bullets, and some that are even flexible panels of LEDs.
Here are just a few different styles of digital LEDs and what they look like.


Digital LED Driver
Next thing we need to talk about is the Digital LED driver. Most options will have a network connection instead of a dmx connection. They are meant to control anywhere from a full dmx universe (170 RGB LEDs) up to 32 universes (5440 RGB LEDs) or more.
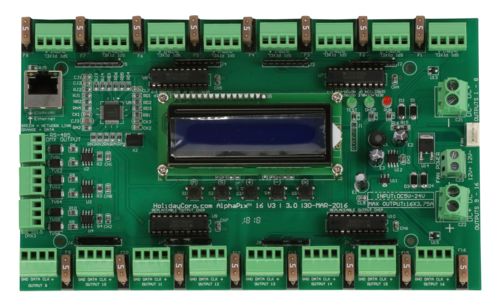
The driver I use is called the Alphapix 16 and is from holidaycoro.com, it can do 16 physical outputs and up to 32 dmx universes.
Whatever driver you use will be rated for a certain amount of LEDs per output, and if it has multiple outputs, it will have a maximum number of LEDs per unit as well. You will normally see two numbers, the max amount of LEDs per channel and the max amount without power injecting.
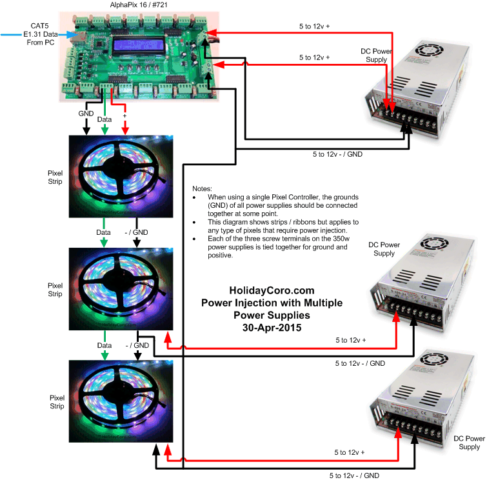
Because of the resistance of the LEDs and the wire/tape, you can only run so many LEDs without them starting to change colors or brown out. This is where power injecting comes in.
You can run another set of wires carrying power and ground from your power supply or even run additional power supplies and add/inject power periodically throughout your system to make sure all your LEDs are getting enough power, much like analog. As a note if you are doing power injection, be careful to never run the positive voltage from your additional power supplies back through the LED tape into a previous power supply. Every power supply in the section needs to share the same ground.
There is a bit of added complexity when power injecting, which is why in general I will choose to use an additional driver to handle the extra LEDs. An added benefit is more flexibility in design.
What hardware Should I Buy?
Everyone always asks what is the best LED driver, or what LED driver should I buy?
Like most things in life, it depends. It depends on your needs, it depends on your budget, and to some extent it depends on your skill level as well.
With all that in mind here is hardware I use.
I buy almost exclusively through www.holidaycoro.com. They are a great company to work with, are here in the USA, have high quality products, and can get things to you in a hurry.
For LED tape I use Holidaycoro’s 12v 30 led per meter LED tape.
I also use a ton of their LED nodes strings with 6″ spacing

And our LED grid (the Homebrew) is built using their Brilliant Bulb RGB Pixel C9 bulb

For drivers I use the Alphapix classic 16 which you can buy in a kit with power supply and pigtails pre-assembled.
The Software
Network Protocols
To start lets touch briefly on some network protocols used in digital LED.
I have given whole talks on this before, but we will try and be quick here.
The main protocols we generally see in the LED world are:
sACN – Multicast, or unicast. It timestamps your network packets. It is the only protocol to use if you plan on going wireless…please don’t go wireless.
ARTNET – The standard for a long time in lighting network protocols, most things will speak this.
Klingnet – Newer to the game, made specifically for video and LED. Time synchronous.
What do I need?
OK so you have this beautiful LED installation, and its optimally powered and wired into the drivers and the drivers are all setup…what now? In most cases we need software to actually turn LEDs on and off.
If you have a small enough installation, or you are mostly using analog LED tape you can probably rely on your lighting console to control everything. However, once you start to build into a bigger system you are going to need a media server of some kind.
It could be anything from a free piece of software to $100,000 dedicated physical media server or anywhere in between based on your needs.
Now is when I get the question well what do I need? And that is a great question.
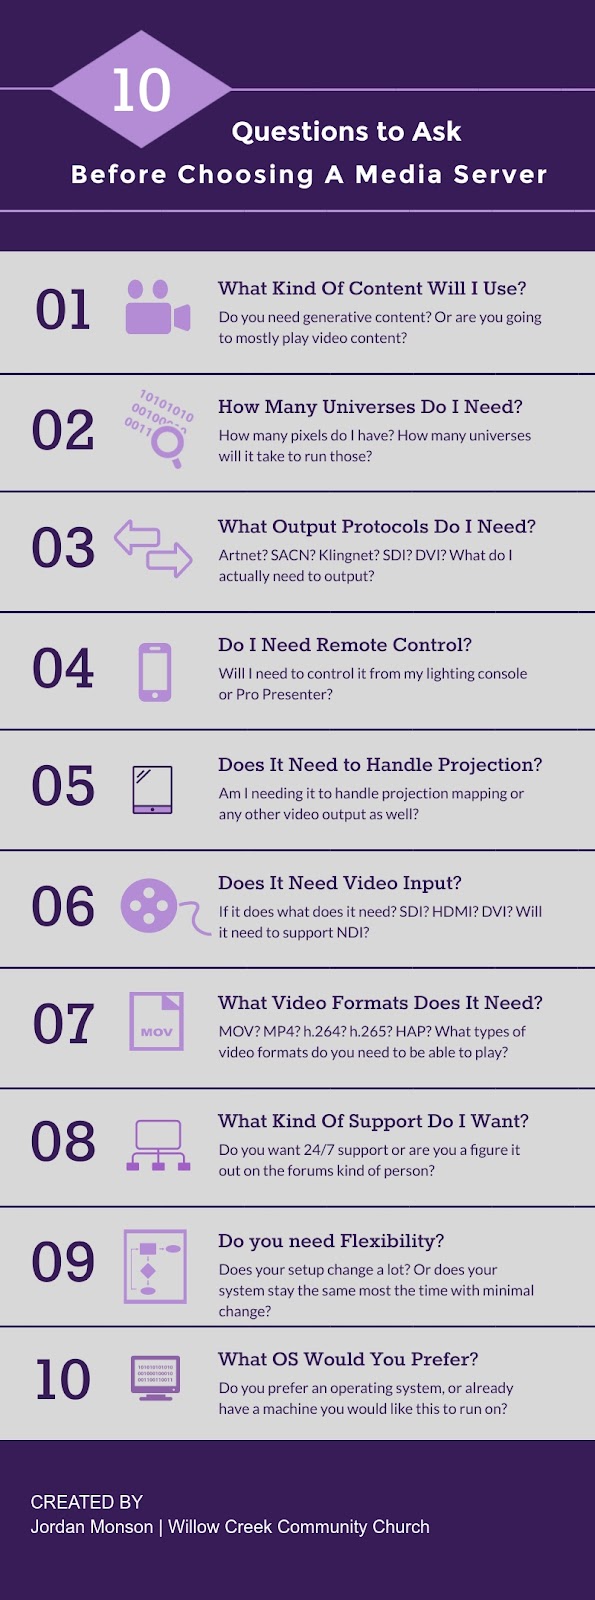
Here are some questions when considering which media server is right for you.
The User Friendly Scale.
In general until you get to a certain threshold in media servers, the more you spend the more user friendly they are, however there are a few exceptions.
There is then another point in which media servers can start to do so much that the complexity increases and the user friendliness starts to fall again. So consider purchasing something in the middle that is user friendly but not too complex.
Full disclosure on this next part my Brothers church in Billings, Montana developed the software I am going to talk about, but I receive nothing for using it, or talking about them.
Pixel Mapping Software
The aptly named Pixel Mapping Software from Faith Chapel is a free LED server that can handle most people’s needs for LED control and quite honestly can blow many servers out of the water on what you can do with it. With that said, the software is a bit complicated at times. It has a decent set of tutorial videos on the website to help you learn and the developers are generally very responsive with questions.
This software is actually what we are using for the LED content in the Filo sessions in our Lakeside auditorium, as well as what we have been using since the beginning of the year for our Midweek and Impact services here at Willow.
Some other options available are, Enttec’s ELM software, which we use for some permanent installations in our student ministry areas. As well as Madmapper, which is used at a few of our regional campuses.
Designing a system:
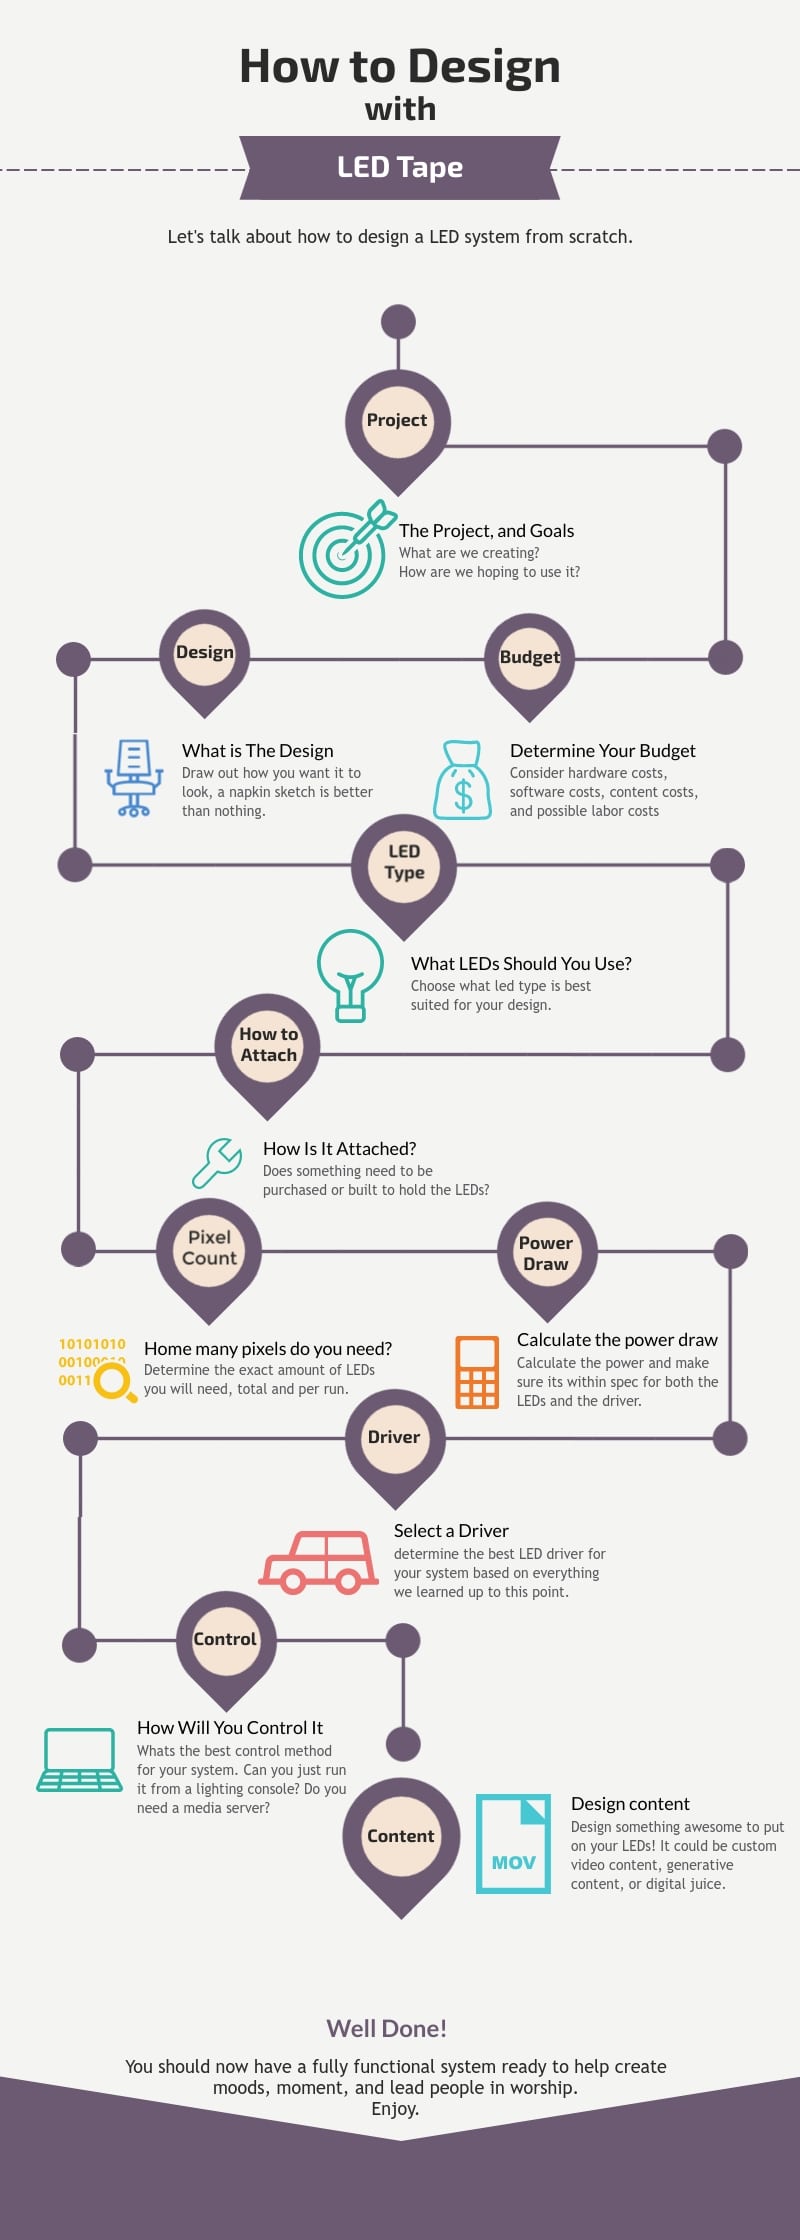
Now we have talked about chip types, LED form factors, drivers, and software, let’s talk about how to design a digital LED system.
This info graphic should help you to start creating a fully functional LED system. That will help in creating moods, moments, and lead people in worship.
The Pretty Stuff:
Now the part everyone has been waiting for, how to make it pretty!
Here are a few different styles of LED lighting to give you some ideas.
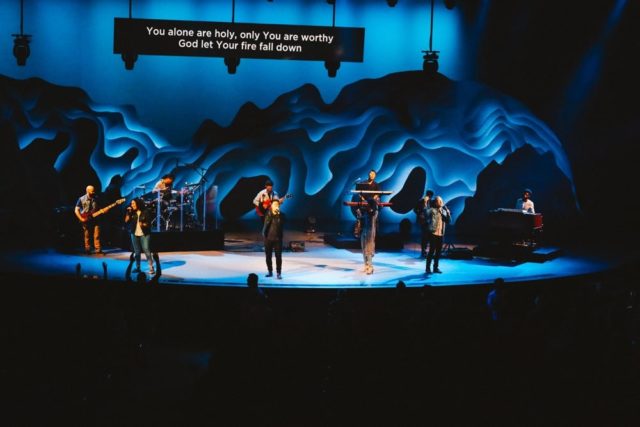
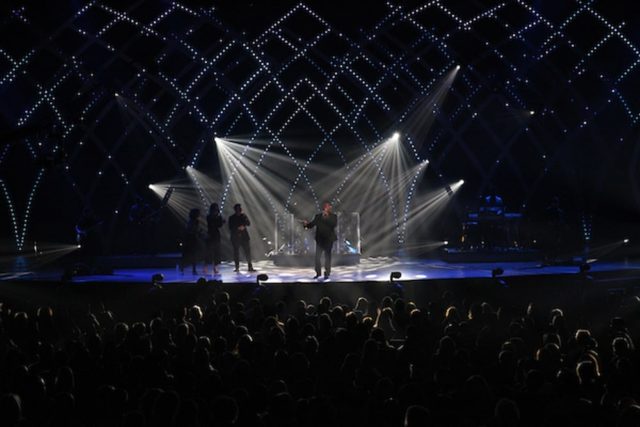
Edge Lighting
With this technique you are aiming to not see the LEDs at all. Hide them behind layers in your set, and use them to glow the nearby areas.


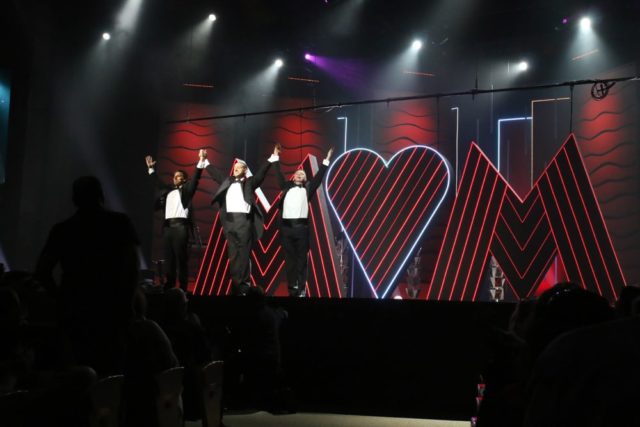
Visible Pixels
This technique is aimed at seeing the face of the LEDs themselves, whether it is tape or pixel nodes. Normally this is for accenting elements of your stage design.


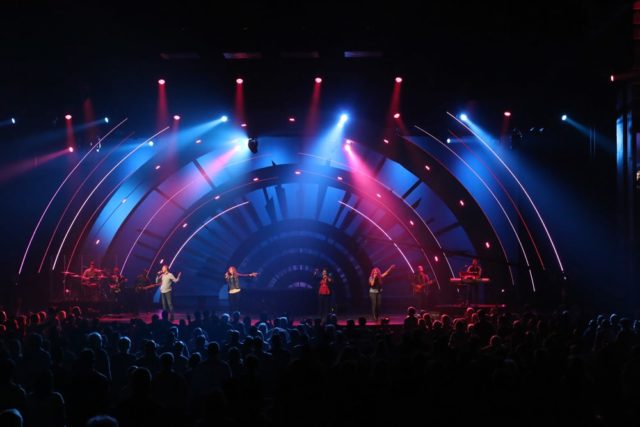
Diffused LEDs/Tubes and Things
This is similar to visible pixels, but instead of raw tape you are looking at a tube, or aluminum channel with some sort of diffuser on it.

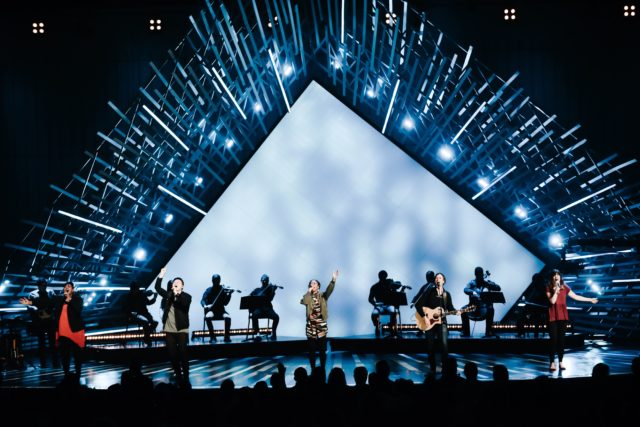

Walls and Grids
These are generally aimed at making entire backdrops out of LED, most the time with a lower density of LEDs 3 inch to 12 inch spacing. It can also be used to accent specific sections of stage design.


Conclusion
I hope this has given you some resources and inspiration to help you design with LED tape and pixel mapping. If you enjoyed this article or have questions please leave a comment below.